Here are some photos of the construction of a wooden plane I made, based around an antique smoothing blade. The blade was purchased from an antique store in Vancouver for $15 in an old 1900s English wooden plane. The blade which includes a chipbreaker needed some cleaning, but the steel is great quality once sharp. The main weight of the plane came from a piece of walnut.
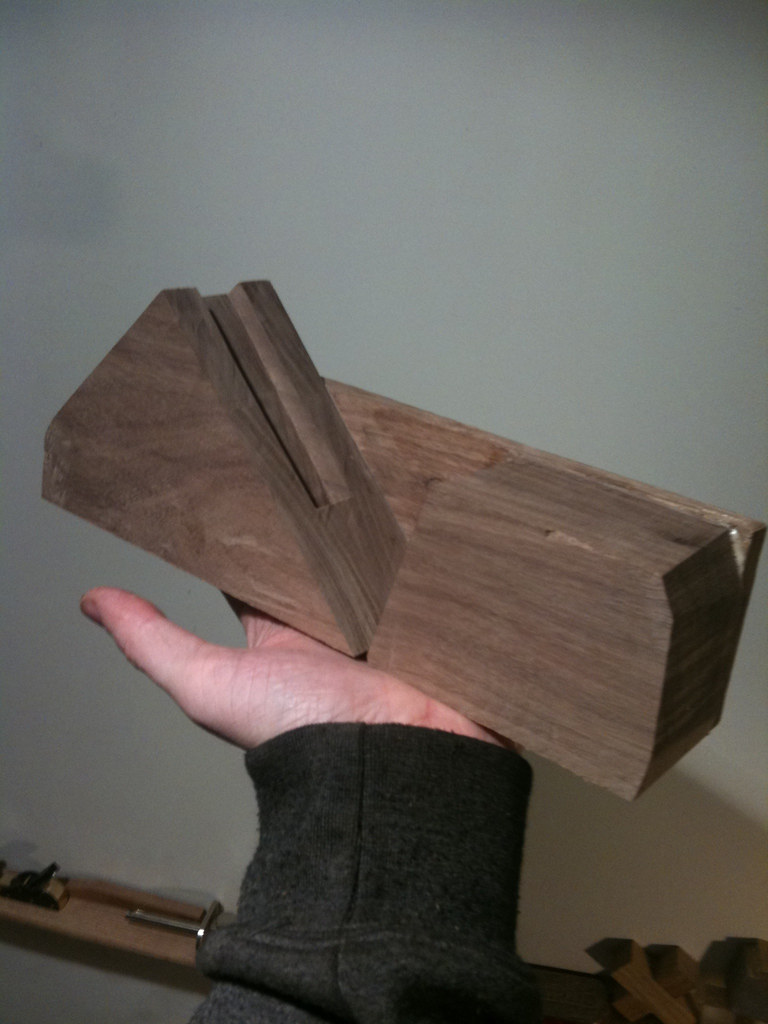
I bookmatched the walnut for aesthetic reasons, and I was happy I did when I saw the beautiful diamond pattern formed on the back portion of the plane.
I originally intended to use walnut for the sides, but I found it quite difficult to work with as the grain was moving a lot. In the end I decided to go all out, and used some nice koa for the sides. Here you can see the back and front pieces of the plane glued to one side, with a slot cut for the blade's screw bolt.
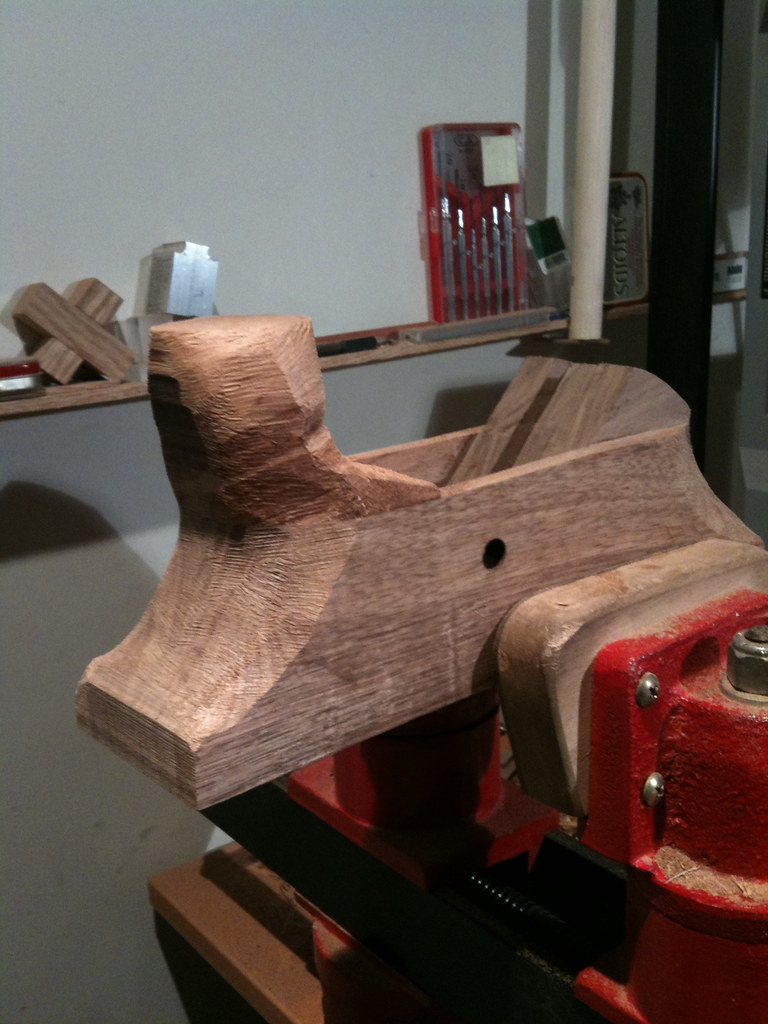
With both sides glued in place I added another lump of koa in the front for a handle or 'horn'. You can also see the hole that has been drilled for the horizontal steel rod. The rod holds the wedge in place, and the wedge holds the blade down. I also made the wedge out of koa.
Here is the initial carving of the shape. I used a rasp for nearly all of the carving, and it was very time consuming to remove so much wood by hand. It was quite enjoyable though and I am very happy with the final result.
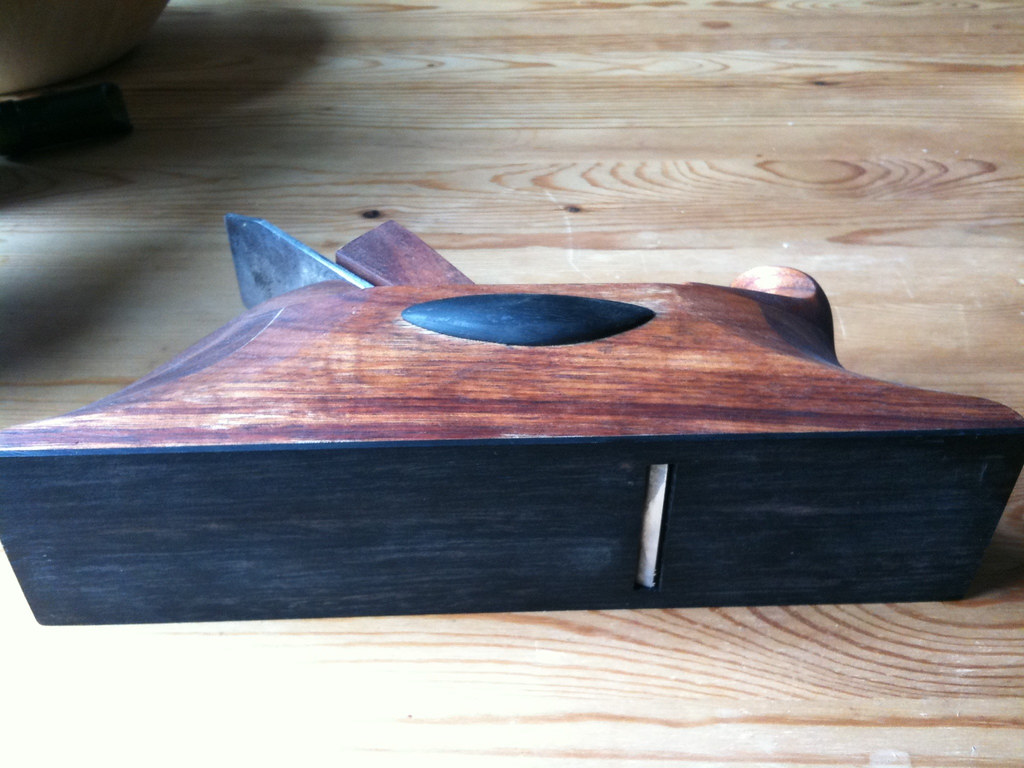
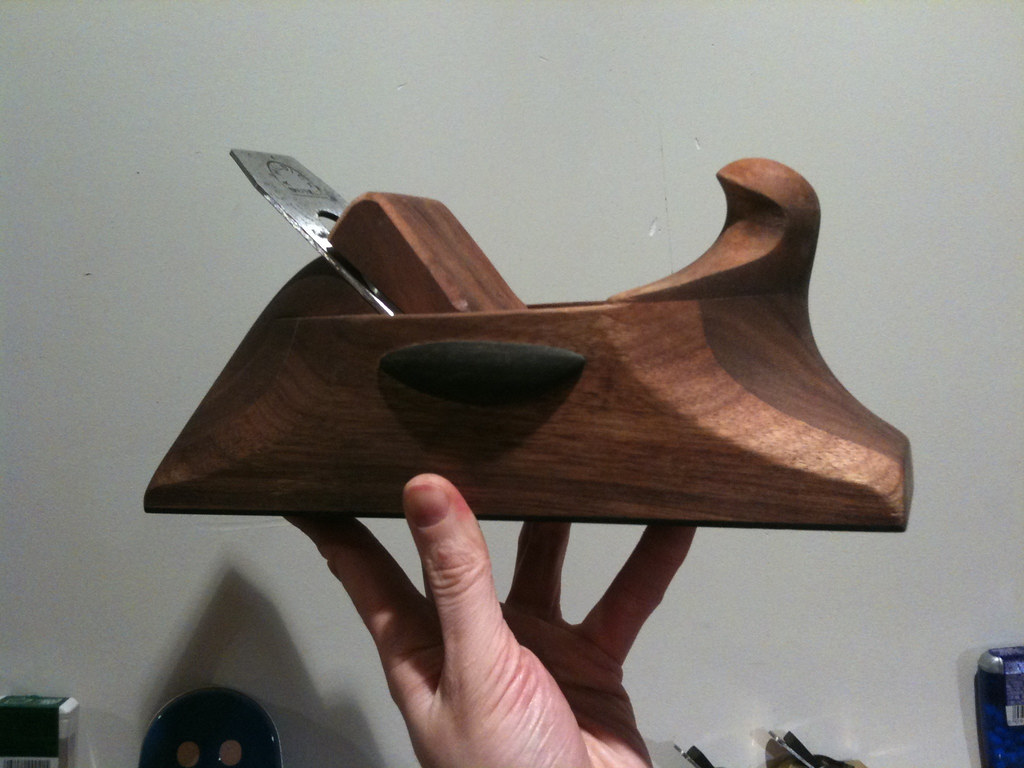
Here is the plane shaped, with ebony reinforcements on the sides and temporarily finished with lemon oil. Once I learn how I will french polish it instead. The handle at the front, and the heel are both very comfortable in the hands (they should be, since I made them to fit my hands!), and I can't wait to use this plane for some serious work.
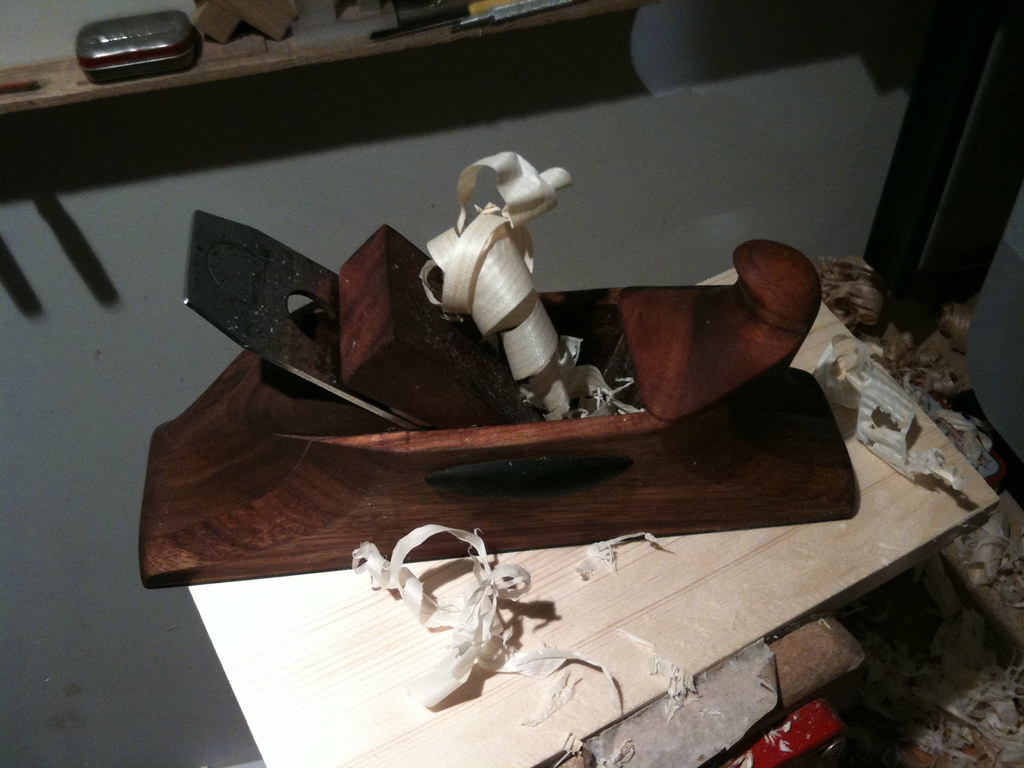
Here is the plane doing some test cuts of some scrap pine. The blade needs a little more work to make it super fine, but I was still able to make some very thin shavings.
Here you can see the ebony base. I decided to use ebony here to match the side reinforcements, but more importantly because ebony is so hard and long lasting it makes a perfect surface for a plane that will be used a lot. The base was flattened on a large sanding block.
After some use I realised the design of the handle, with an overhanging lip was making hard for the shavings and chips to escape. I made a slight modification to the shape of the throat to improve this.
That's all I have to show for now, and there won't be any more updates for a while as I'm going traveling and won't be near my workshop.
Work on the guitar (and the random things I'm making to make it) will resume after the summer!