I need to get my skates on and finish the documentation for this guitar. It's been finished for months, but this blog is only halfway through!
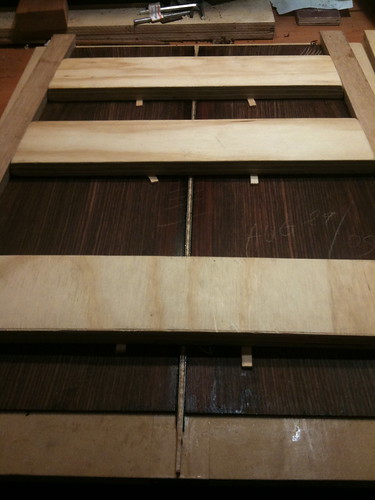 First the two bookmatched pieces of rosewood were glued together in a wedged gluing jig. The jig has tapered rails with overhanging edges that allow the centre spars to be wedged in tightly. The further forward in the jig they are, the tighter they press down on the joint. Waxed tape is places below the glue-line to prevent it from sticking.
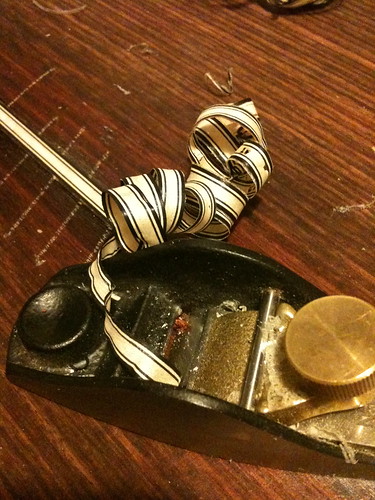
After the glue has dried the oversized centre strip is cleaned up. This photo shows a nice shaving of the central flamed maple strip and the 3-layer veneer sandwich on either side. Not all guitars have centre strips, but Hauser style guitars are known for bold and simple lines like this.
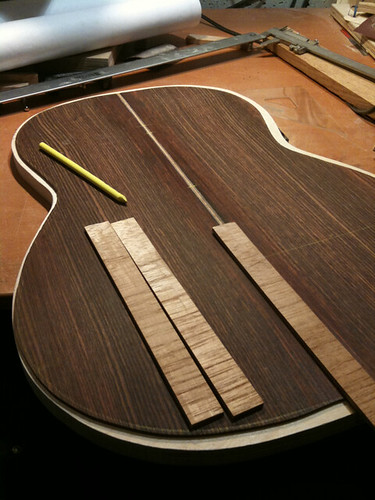
After the back has been cut to shape, reinforcement is glued to the centre strip. This can be mahogany, or in this case spanish cedar. Cross grain strips are used to compliment the long grain running along the back. This helps prevent cracking, and ensures extra strength.
 Both the centre reinforcement, and the back braces are glued in the go-bar deck like the top braces. The main difference here is that the back is resting in a specially dished jig which provides the curve or 'bombado' for the back.
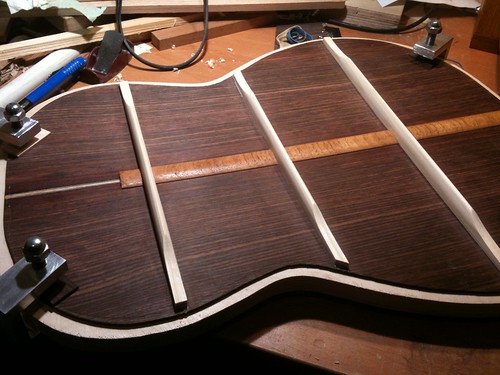 After the back braces are glued they are shaped similarly to the top braces. The back braces are much taller than the top braces however. In this photo you can also see that a thin layer of shellac has been applied to the central cedar strips. Also note the blank area where the foot of the heel will be glued.
First the two bookmatched pieces of rosewood were glued together in a wedged gluing jig. The jig has tapered rails with overhanging edges that allow the centre spars to be wedged in tightly. The further forward in the jig they are, the tighter they press down on the joint. Waxed tape is places below the glue-line to prevent it from sticking.After the glue has dried the oversized centre strip is cleaned up. This photo shows a nice shaving of the central flamed maple strip and the 3-layer veneer sandwich on either side. Not all guitars have centre strips, but Hauser style guitars are known for bold and simple lines like this.
After the back has been cut to shape, reinforcement is glued to the centre strip. This can be mahogany, or in this case spanish cedar. Cross grain strips are used to compliment the long grain running along the back. This helps prevent cracking, and ensures extra strength.
After the back braces are glued they are shaped similarly to the top braces. The back braces are much taller than the top braces however. In this photo you can also see that a thin layer of shellac has been applied to the central cedar strips. Also note the blank area where the foot of the heel will be glued.
No comments:
Post a Comment